New Task Creation
Creating a task in KarmaAxis is now faster and cleaner, thanks to a simplified interface that focuses on what matters most first — and lets you expand for more only when needed. Follow these steps to ensure that tasks are created efficiently and with all necessary details:
Basic Task Creation (Default View)
Step-by-Step Process:
1. Open the Create Task Interface
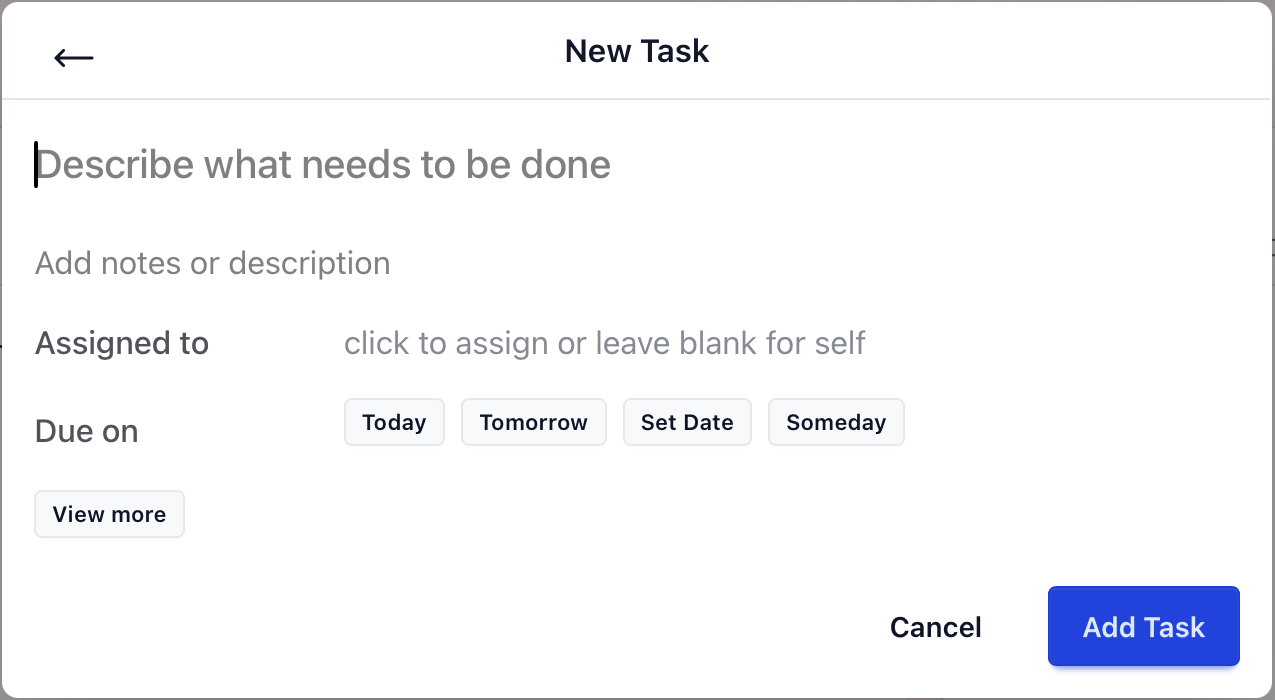
The task creation interface allows you to fill out important information related to the task. You’ll see several fields that need to be completed based on the task's nature.
2. Describe What Needs to Be Done
In this field, provide a clear and concise description or main action of the task. Be direct - this shows up everywhere, and ensures that the person assigned to it (which may be yourself) knows exactly what needs to be accomplished.
3. Notes
Add any additional notes or descriptions in this section. This is useful for providing more context or specific instructions related to the task that might not fit in the “Describe what needs to be done” field.
4. Assigned To
Default: Leave blank if you are the one responsible for the task.
Assign to another: Click the field to assign the task to another team member or individual. A dropdown should appear, allowing you to select the appropriate assignee.
5. Set Due Date
There are four options available for setting the due date of the task:
Today: Select if the task needs to be completed by the end of the current day.
Tomorrow: Choose if the task must be completed by the following day.
Set Date: Click this option to manually select a specific date using a calendar picker.
Someday: If the task does not have a specific deadline, you can use this option, allowing it to remain as a future or less urgent task.
Advanced Task Options
6. For Contact
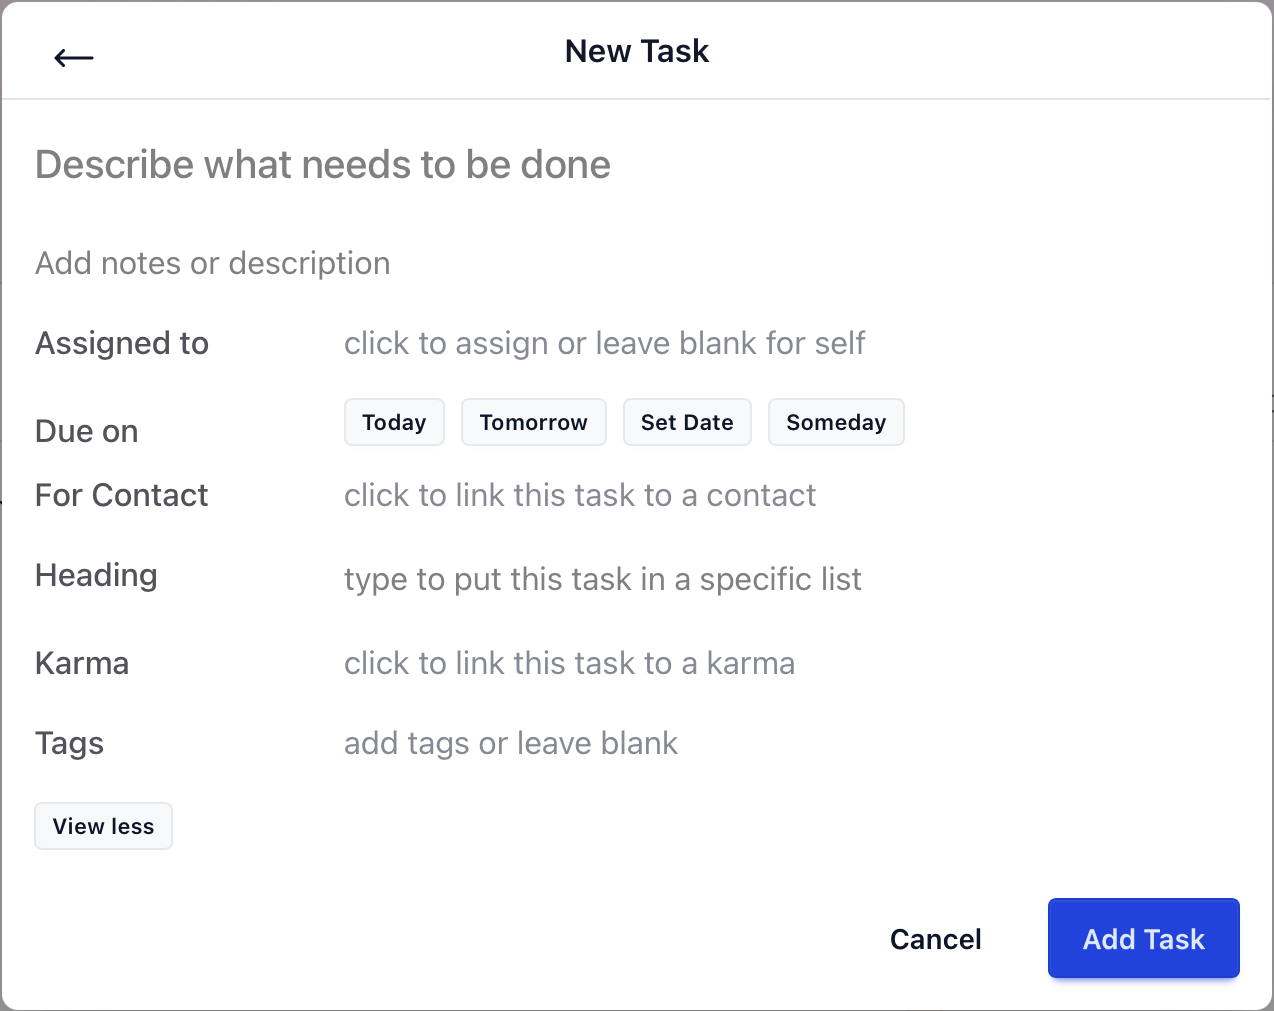
This option allows you to link the task to a particular contact. You can associate the task with a person by clicking the field, which opens a list of available contacts from which you can choose.
Helpful for:
- Sales or Sales follow-up
- Support Tasks
- Field Visit Notes
7. Heading
Type in this field to categorize the task under a specific heading or list. This could be useful for organizing tasks into broader categories like:
- Onboarding
- Marketing
- Backend Fixes
- Payment Follow-ups
Headings help organize your task list visually.
8. Karma
Attach the task to a specific Karma (custom form, process, or register). It will now show inside that Karma’s task panel. This could help you track the task's relevance to a larger initiative.
9. Tags
Use tags to label the task with keywords or phrases that are relevant. This helps in searching and filtering tasks later. Use consistent tags across your team (e.g., “Urgent”, “Billing”, “Sales”).
10. Add Task
Once all the relevant fields are completed, click the Add Task button to save and create the task.
11. Cancel Task Creation
If you decide not to proceed with creating the task, click the Cancel button to close the interface without saving any changes.
Key Notes:
Make sure to be as specific as possible when describing tasks to ensure clarity.
Use due dates, headings, tags, and notes to improve organization and tracking.
Karma linking and task assignment help with task delegation and prioritization.